
Configuring LiveChat
This document provides detailed instructions for configuring LiveChat in channels-connector
Prerequisites
- Active LiveChat account
- Firewall configuration that allows Internet traffic as below:
- channels-connector pod configured to allow inbound traffic in Kubernetes ingress eg. https://channels-connector.app.chatbots.sentione.com/webhooks/livechat
- Inbound traffic - HTTPs webhooks sent from LiveChat servers: .livechat.com, .livechatinc.com (security is provided by checking webhook secret, there is no defined pool of IP addresses)
- Outbound traffic - HTTPs requests made by Automate to host https://api.livechatinc.com and https://accounts.livechat.com
Proxy Configuration (Optional)
If needed you may want to configure connection with LiveChat servers to go through HTTP proxy. To set that please add it to your automate config file:
chatbots.channels-connector {
  livechat {
    proxy {
      host: "1.2.3.4"
      port: 8080
      username: "user"
      password: "password"
    }
  }
}
Step 1: Create application
- Log in to LiveChat Developer Console.
- Go to
Appsand clickCreate a new app. - Create application with chosen App Name and product type LiveChat.
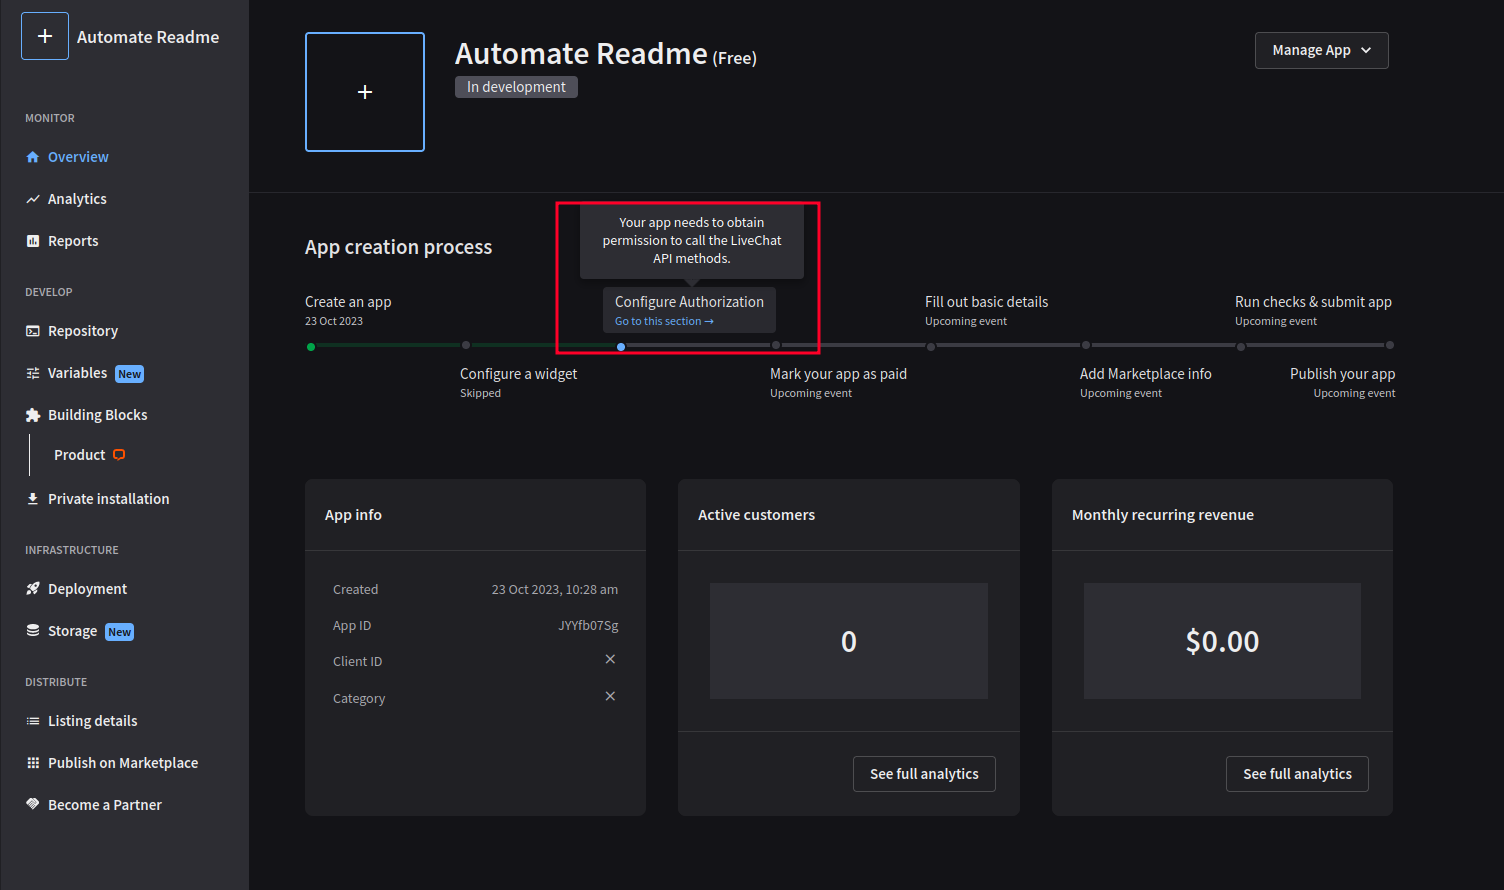
Step 2: Configure application
- From
Appssection, choose newly created application. - Skip widget configuration.
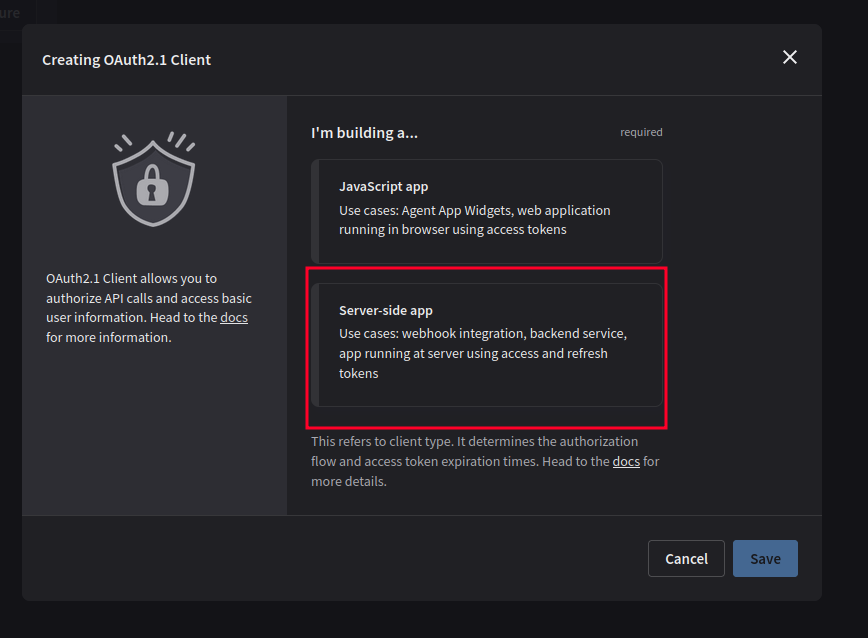
- Choose
Configure Authorizationand select Server Side App.
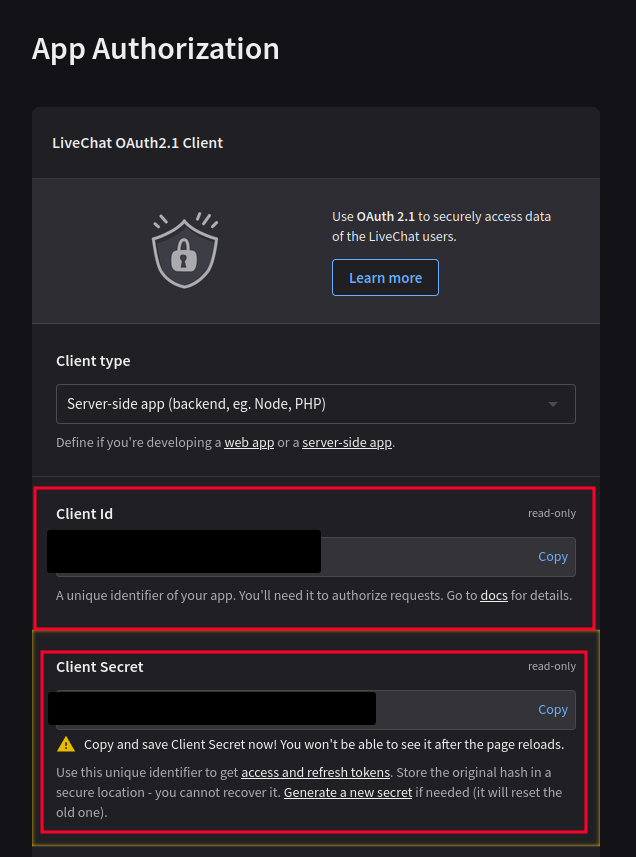
- Save Client Id and Client secret for later use.
- Setup Redirect URI whitelist to point on admin application URL (copy URL from browser).
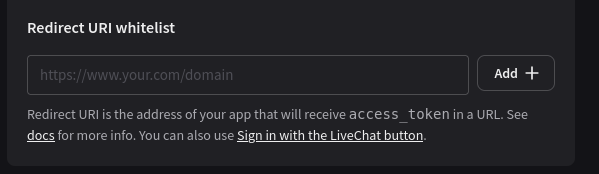
Make sure that Admin apps' config has propertychatbots.admin.is-https: true
-
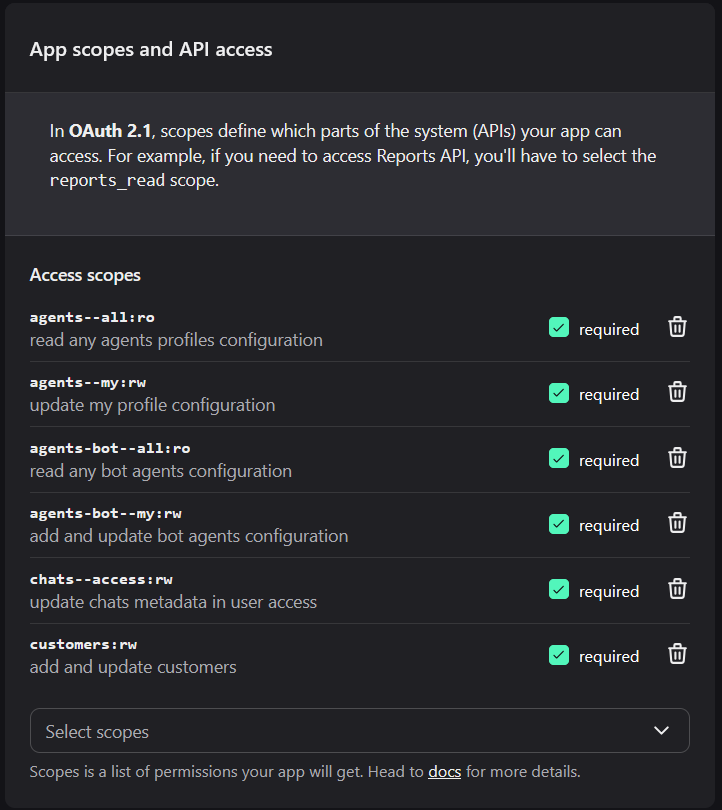
Add following scopes in Scopes section:
- agents--my:rw
- agents-bot--my:rw
- chats--access:rw
- agents--all:ro
- agent-bot-all:ro
- customers:rw
-
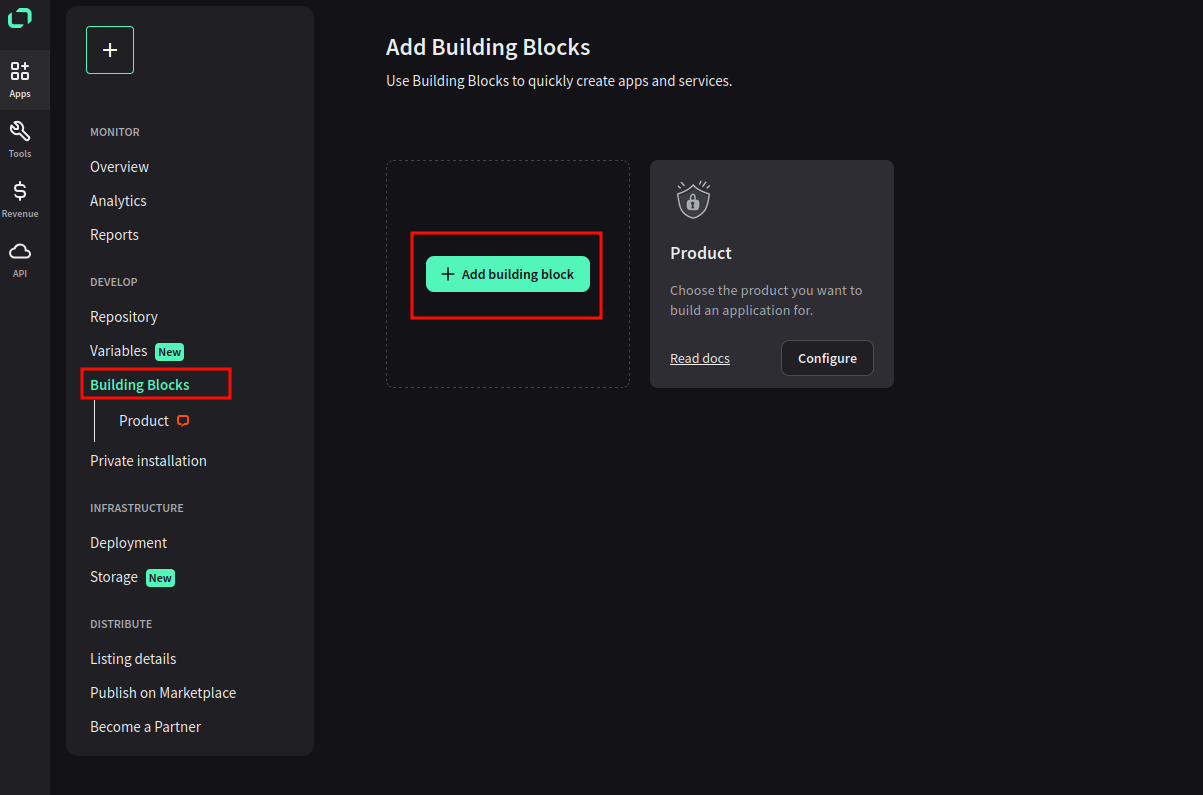
Go to
Building blocksand click Add building block
-
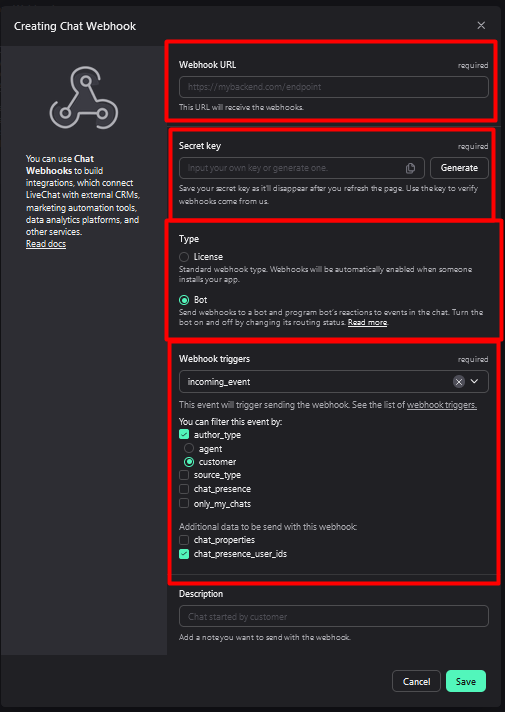
Add Chat Webhooks for incoming_event
- Webhook URL - point on channels-connector application domain with endpoint webhooks/livechat,
- Secret key - save for later use as Webhook secret,
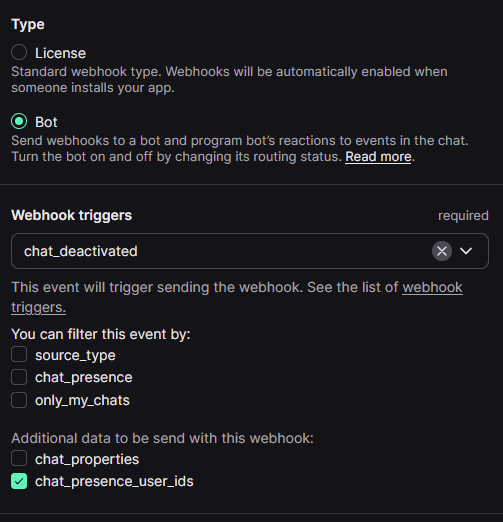
- Type - Bot
- Webhook triggers - filled as shown below.
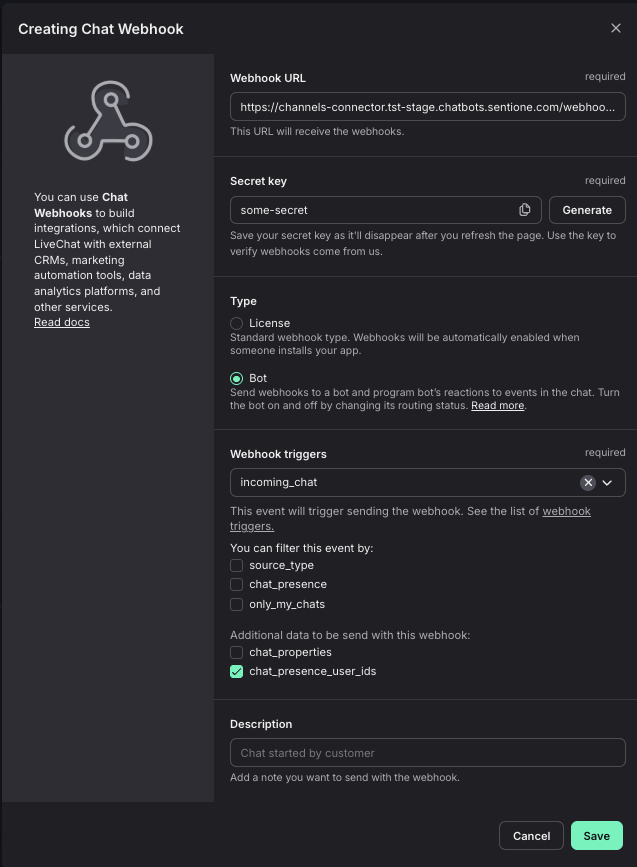
- Add Chat Webhooks for incoming_chat
- Webhook URL - point on channels-connector application domain with endpoint webhooks/livechat,
- Secret key - save for later use as Webhook secret,
- Type - Bot
- Webhook triggers - filled as shown below.
- (Optional) Add
chat_deactivatedwebhook
When this webhook is added, LiveChat will notify Automate when the user closes the chat window or when the chat is archived due to user inactivity. If the conversation with the Bot isn't finished, Automate sends the special message HANGUP_HUMAN in the user's name. This fake message can then be handled in Flow, e.g. to call some integration.
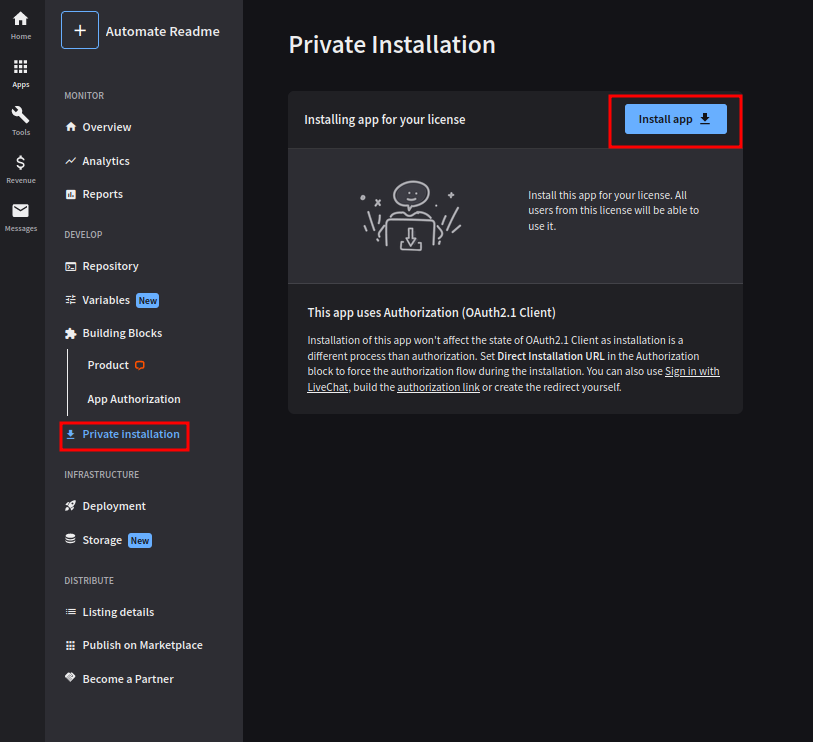
Step 3: Install application
After configuring application, go to Private installation and click Install app.
Step 4: Fill configuration file
chatbots.channels-connector.livechat: {
  enabled: true
  client-secret: "FROM STEP 2-4"
  client-id: "FROM STEP 2-4"
  webhooks-secret: "FROM STEP 2-7"
}
Step 5: Redeploy channels-connector with new configuration
Step 6: Authenticate LiveChat account
Following steps are also available in more details here
- Log in to Automate platform.
- Go to
Channelsand clickCreate -> LiveChat. - You will be redirected to LiveChat's login page.
- Log in using yours credentials.
- Choose Agent name.
- New LiveChat channel will appear on channels list.
Updated 5 months ago