
Configuration
Available from version 253
Adding the Genesys Handover
The Genesys integration allows you to seamlessly hand over conversations from SentiOne Automate to live agents in Genesys Cloud. This enables a smooth transition when complex queries require human intervention.
Prerequisites for Genesys
Before setting up the Genesys handover integration, ensure you have:
- Administrative access to your Genesys Cloud organization
- Permission to create OAuth clients and manage integrations in Genesys Cloud
Prerequisites for SentiOne Automate
Before setting up the Genesys handover integration, ensure you have:
- Permission to edit Channels
Step 1: Role and Permissions Setup
Create Role with Required Permissions
-
Navigate to Admin Settings
- Log in to your Genesys Cloud organization
- Go to Admin > People & Permissions > Roles / Permissions
-
Add New Role
-
Click Add Role
-
Name: Enter a descriptive name (e.g., "SentiOne Automate Role")
-
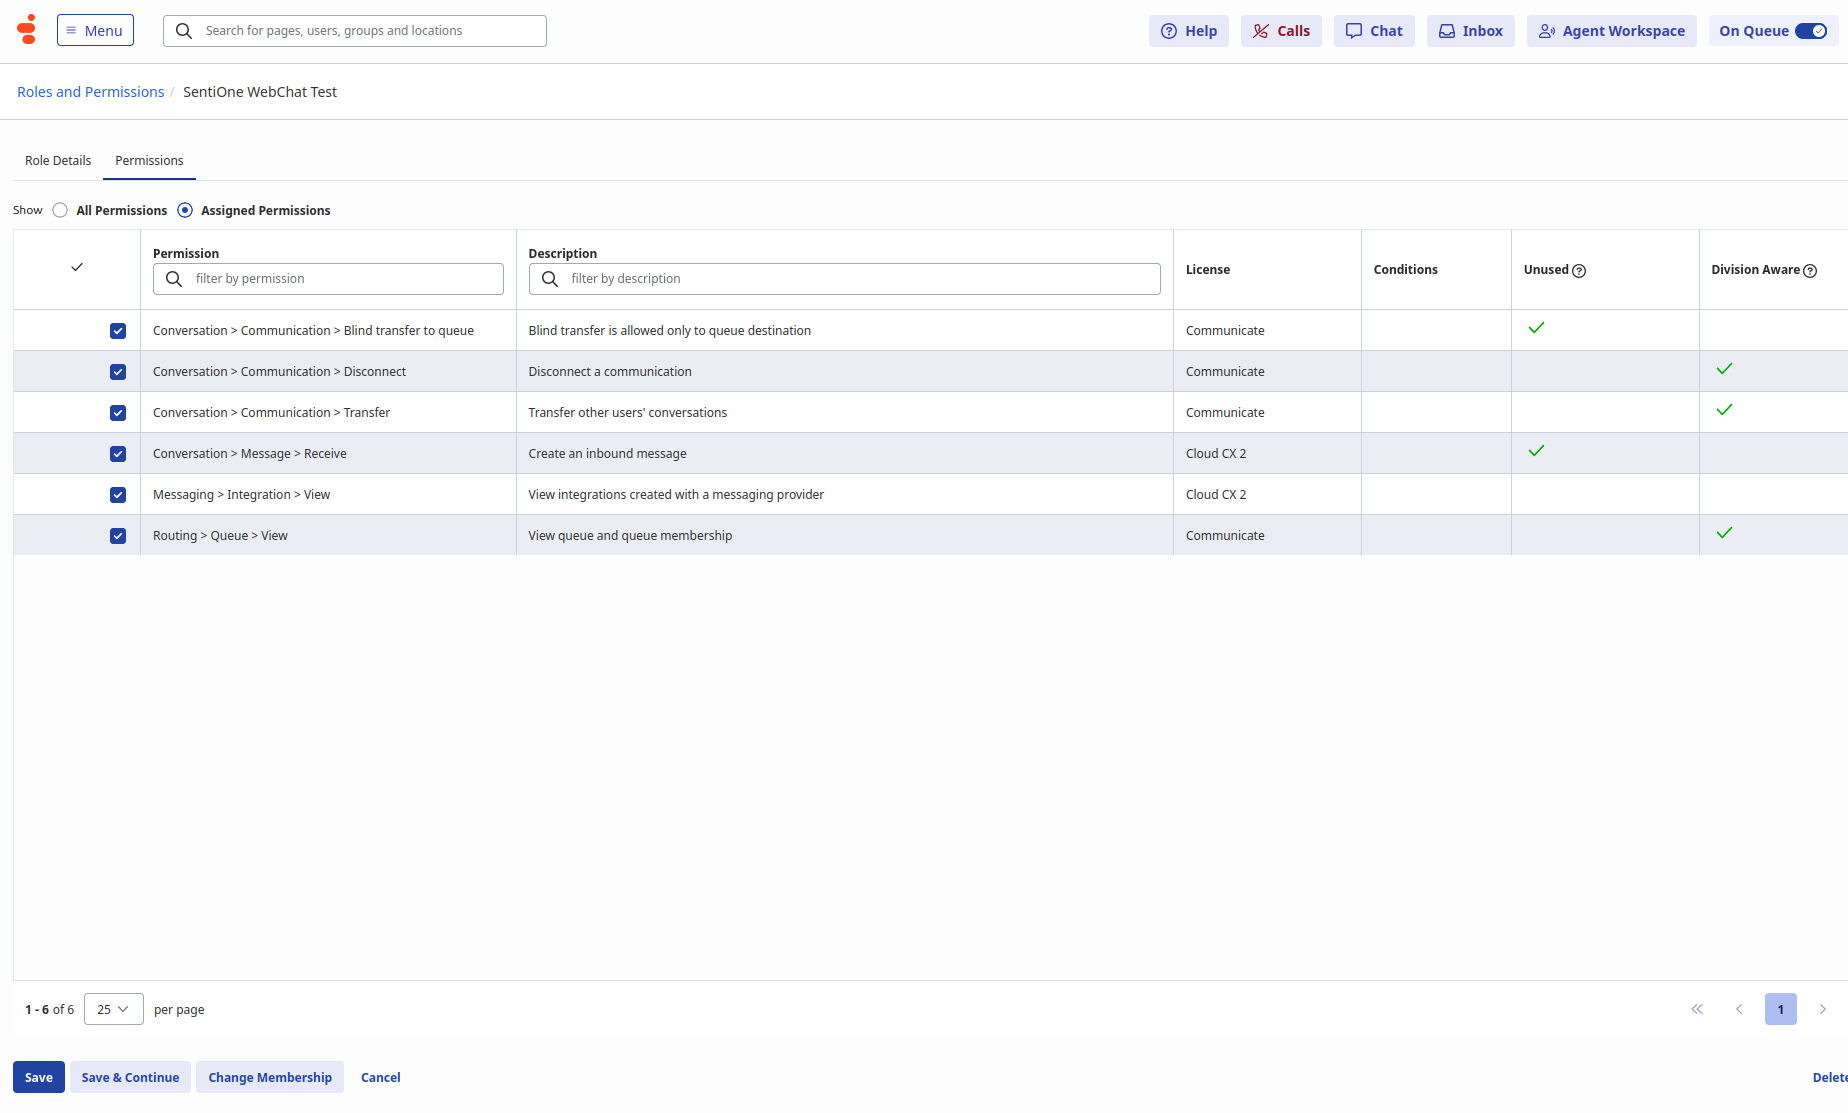
In Permissions tab, select the following permissions:
Conversation > Communication > TransferConversation > Communication > DisconnectConversation > Message > ReceiveMessaging > Integration > ViewRouting > Queue > ViewConversation > Communication > Blind transfer to queue
-
Click Save & Continue
-
-
Assign Role Membership
-
Save Role
- Click Save
Step 2: OAuth Client Setup
Create OAuth Client in Genesys Cloud
-
Navigate to Admin Settings
- Navigate to Admin > Integrations > OAuth
-
Create New OAuth Client
- Click Add Client
- App Name: Enter a descriptive name (e.g., "SentiOne Automate Integration")
- Select Client Credentials as the grant type
- In Roles tab, select the role created in Step 1
-
Save and Record Credentials
- Click Save to create the client
- Important: Copy and securely store the
Client IDandClient Secret - These credentials will be needed for WebChat channel configuration
Step 3: WebChat Channel Configuration
Open WebChat Channel Configuration Form
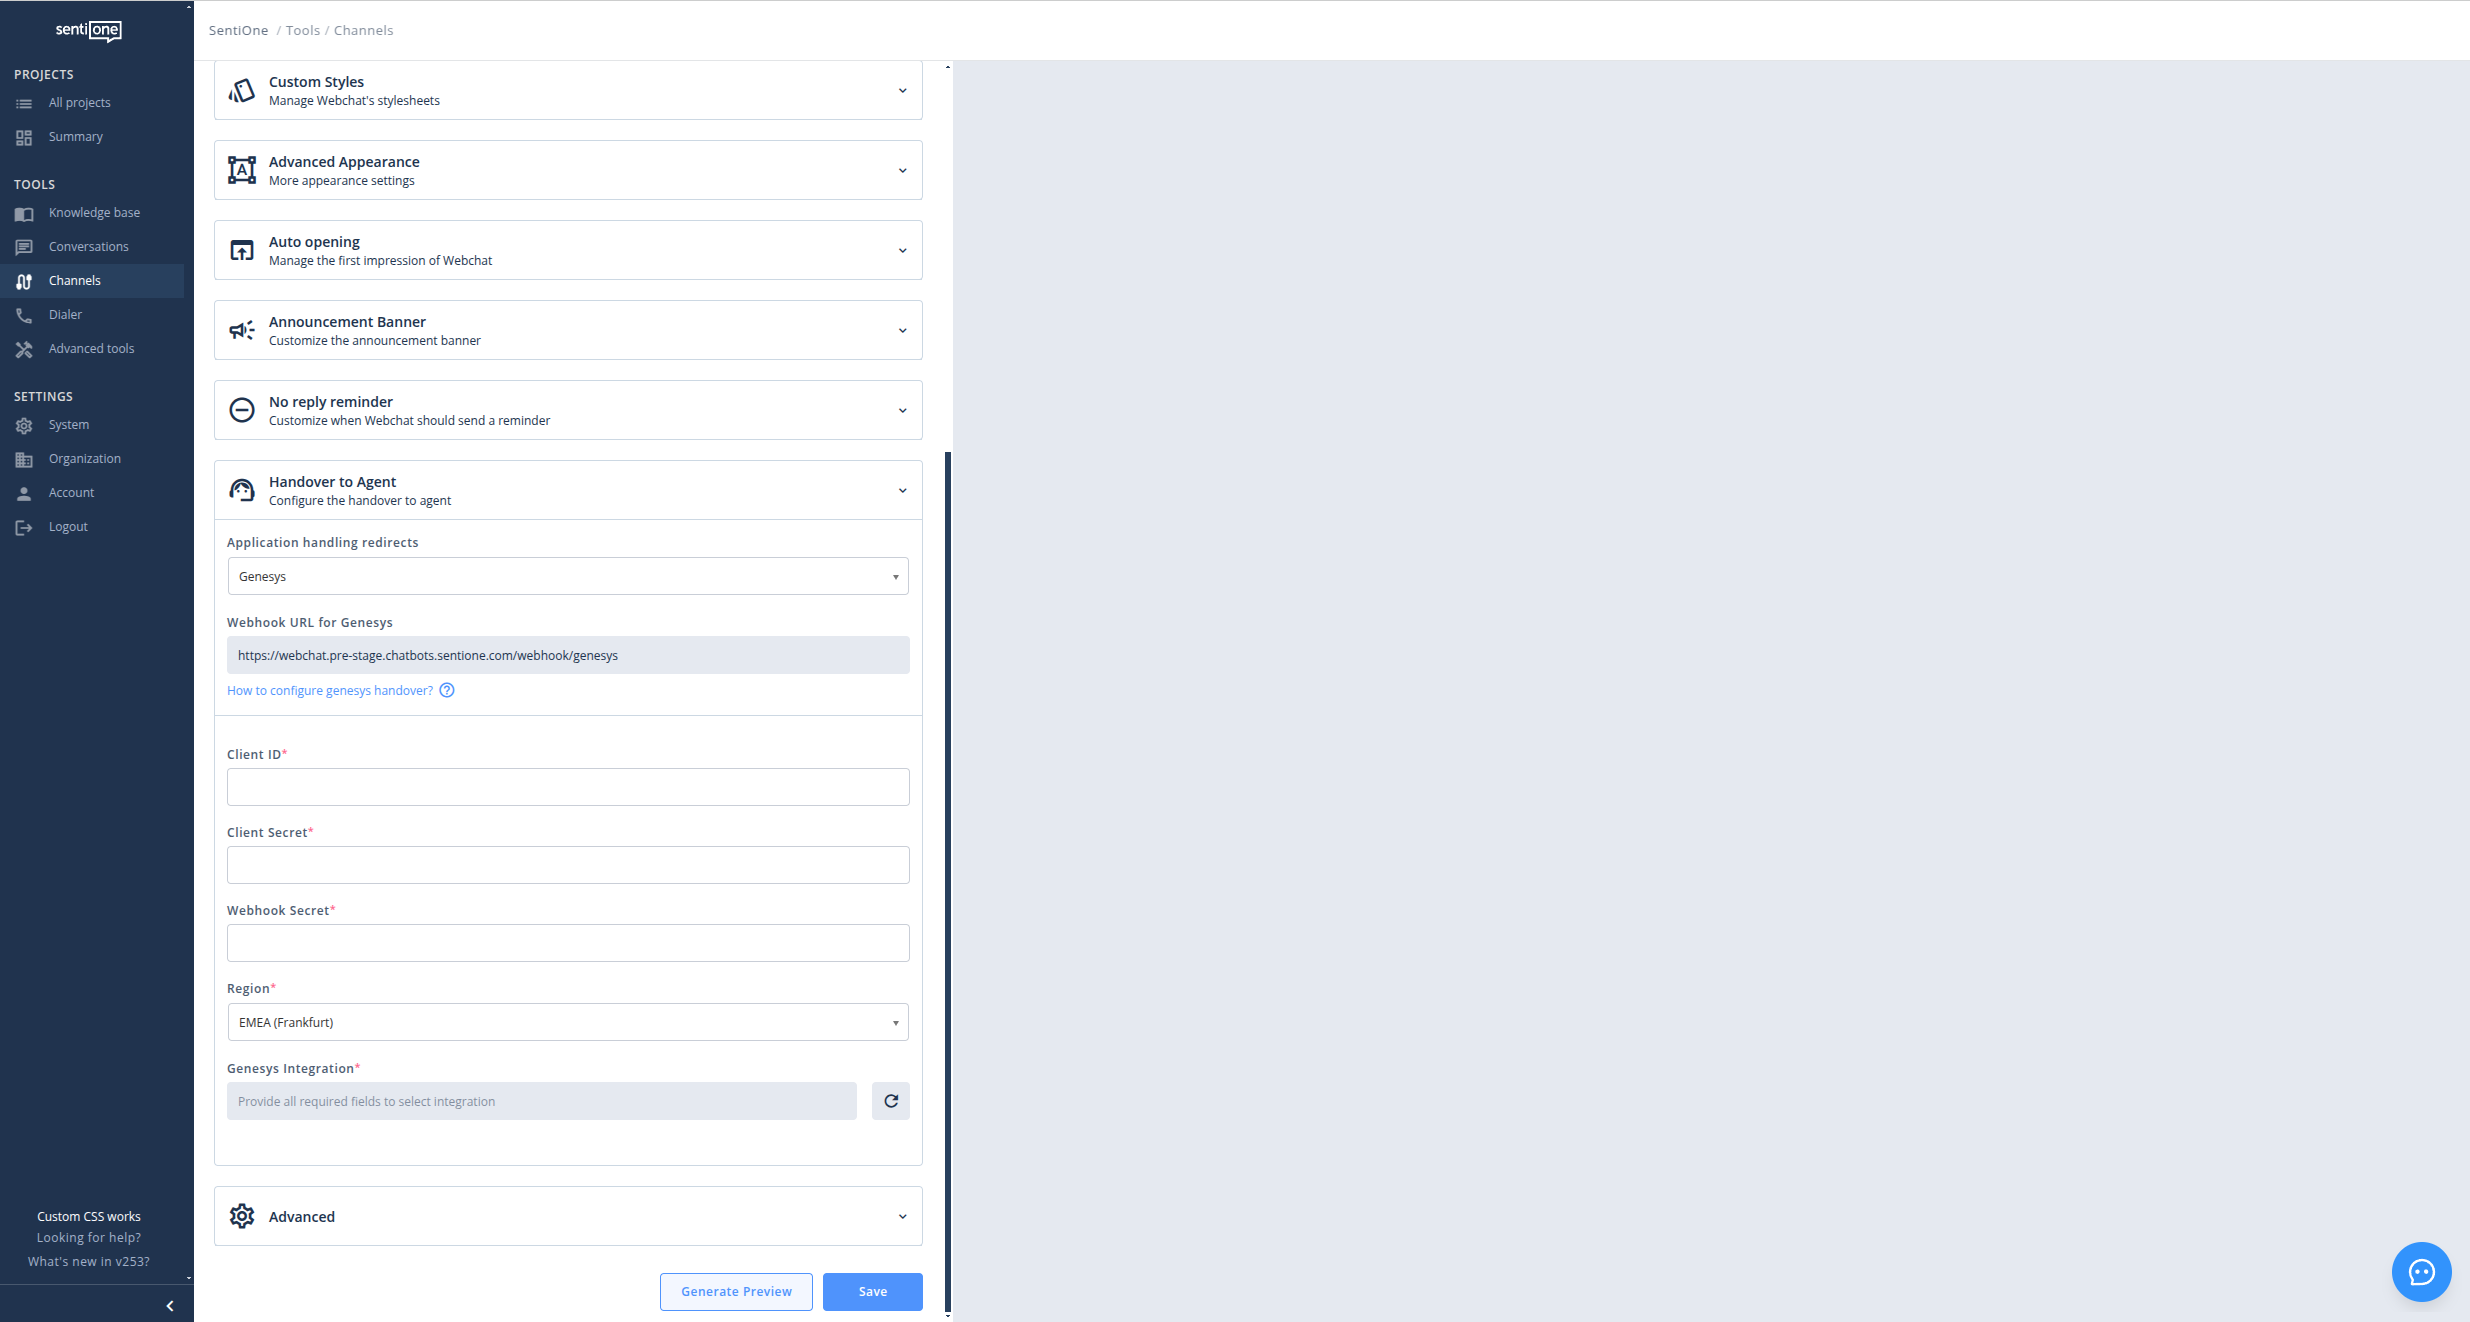
- Navigate to SentiOne Automate
- Go to Channels tab
- Click Create and choose WebChat
- Expand section Handover to Agent
- Choose Application handling redirects > Genesys
- Copy URL under Webhook URL for Genesys and use it in Step 4
Step 4: Messaging Configuration
Enable Messaging Integration
-
Access Platform Settings
- Navigate to Admin > Message > Platforms in Genesys Cloud
- Click Create New Integration
- Choose Open Messaging
-
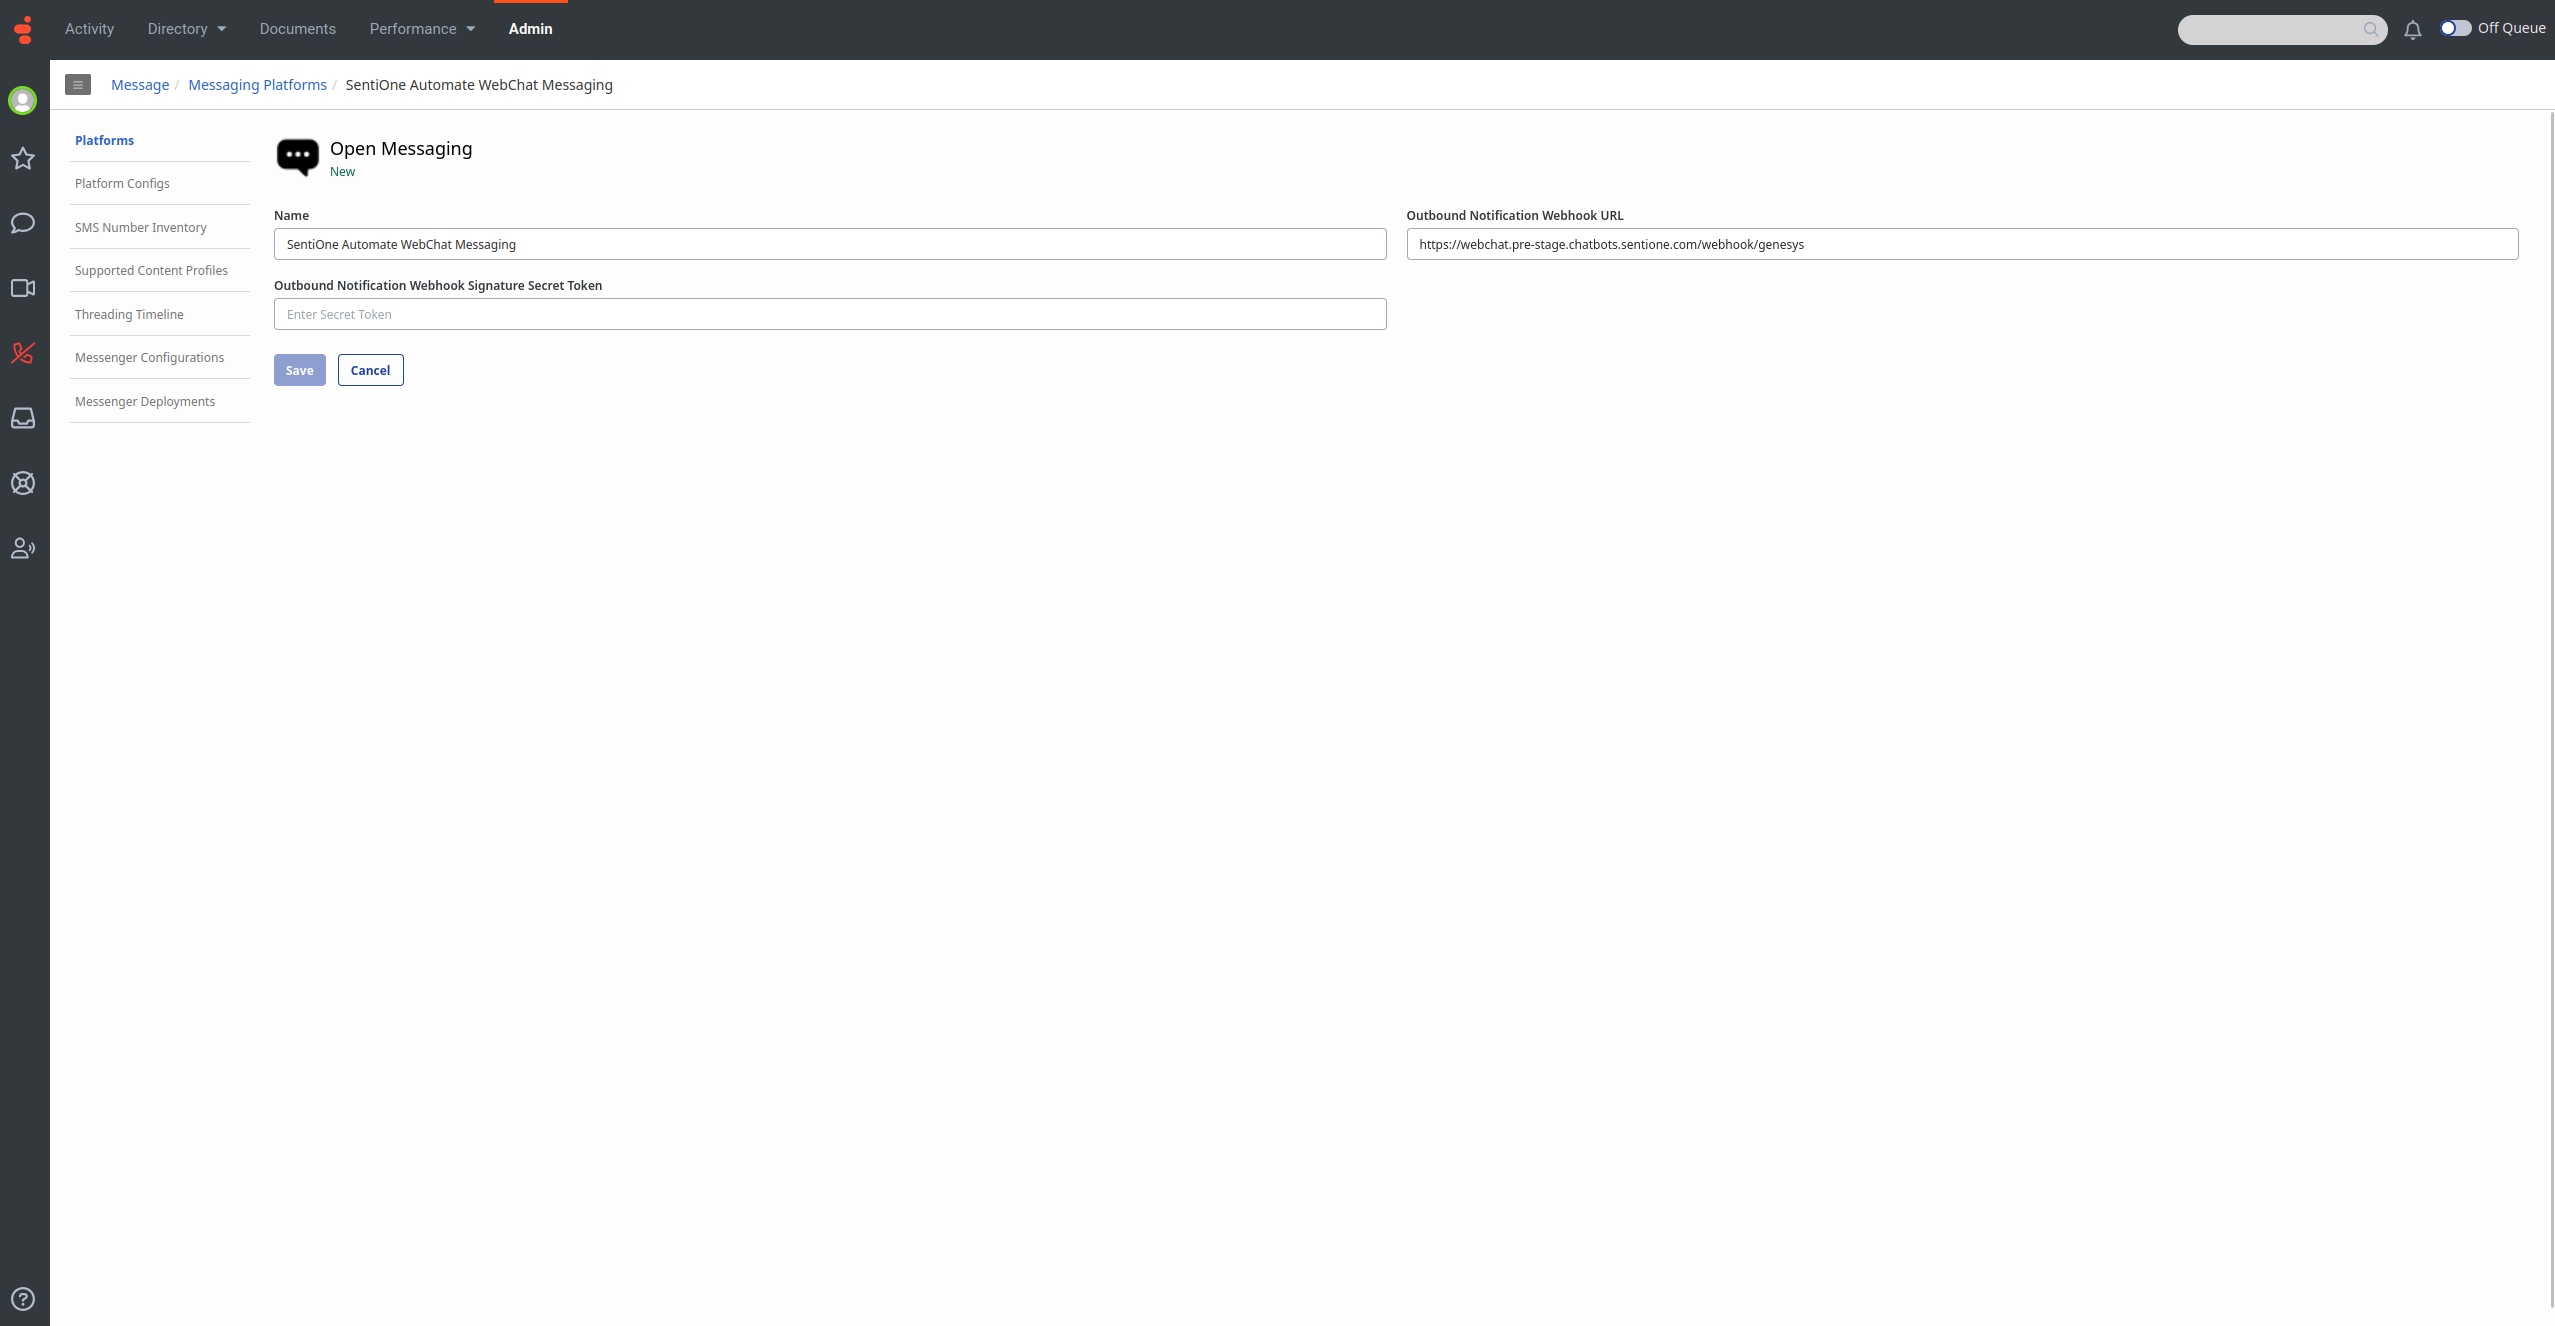
Configure Open Messaging
- Name: Enter a descriptive name (e.g., "SentiOne Automate WebChat Messaging")
- Outbound Notification Webhook URL: Copy this URL from WebChat channel configuration form from Step 3
- Outbound Notification Webhook Signature Secret Token: Enter a unique secret key that will be used to sign webhook notifications. This key should be randomly generated, at least 32 characters long, and kept confidential. SentiOne Automate will use it to verify the authenticity of webhook requests.
- Save the configuration and note the integration details for later use
Step 5: Queue Management
Navigate to Queue Settings
- In Genesys Cloud, go to Admin > Contact Center > Queues
Create Bot Queue
- Create New Bot Queue
- Click Create Queue
- Name: Enter descriptive name (e.g., "SentiOne Automate WebChat Bot Queue")
- Division: Select appropriate division (same as in previous steps)
- This queue will handle initial bot interactions
Create Agent Queue
-
Create New Agent Queue
- Click Create Queue
- Name: Enter descriptive name (e.g., "SentiOne Automate WebChat Agent Queue")
- Division: Select appropriate division (same as in previous steps)
-
Configure Queue Members
- Open the created agent queue
- Navigate to Members tab
- Select agent(s) responsible for handling messages on this queue
Step 6: Architect Flow Configuration
Create Handover Flow
-
Access Architect
- Navigate to Admin > Architect > Inbound Message
-
Create New Flow
- Click Add to create new inbound message flow
- Name: Enter descriptive name (e.g., "SentiOne Automate Flow")
- Division: Select appropriate division (same as in previous steps)
-
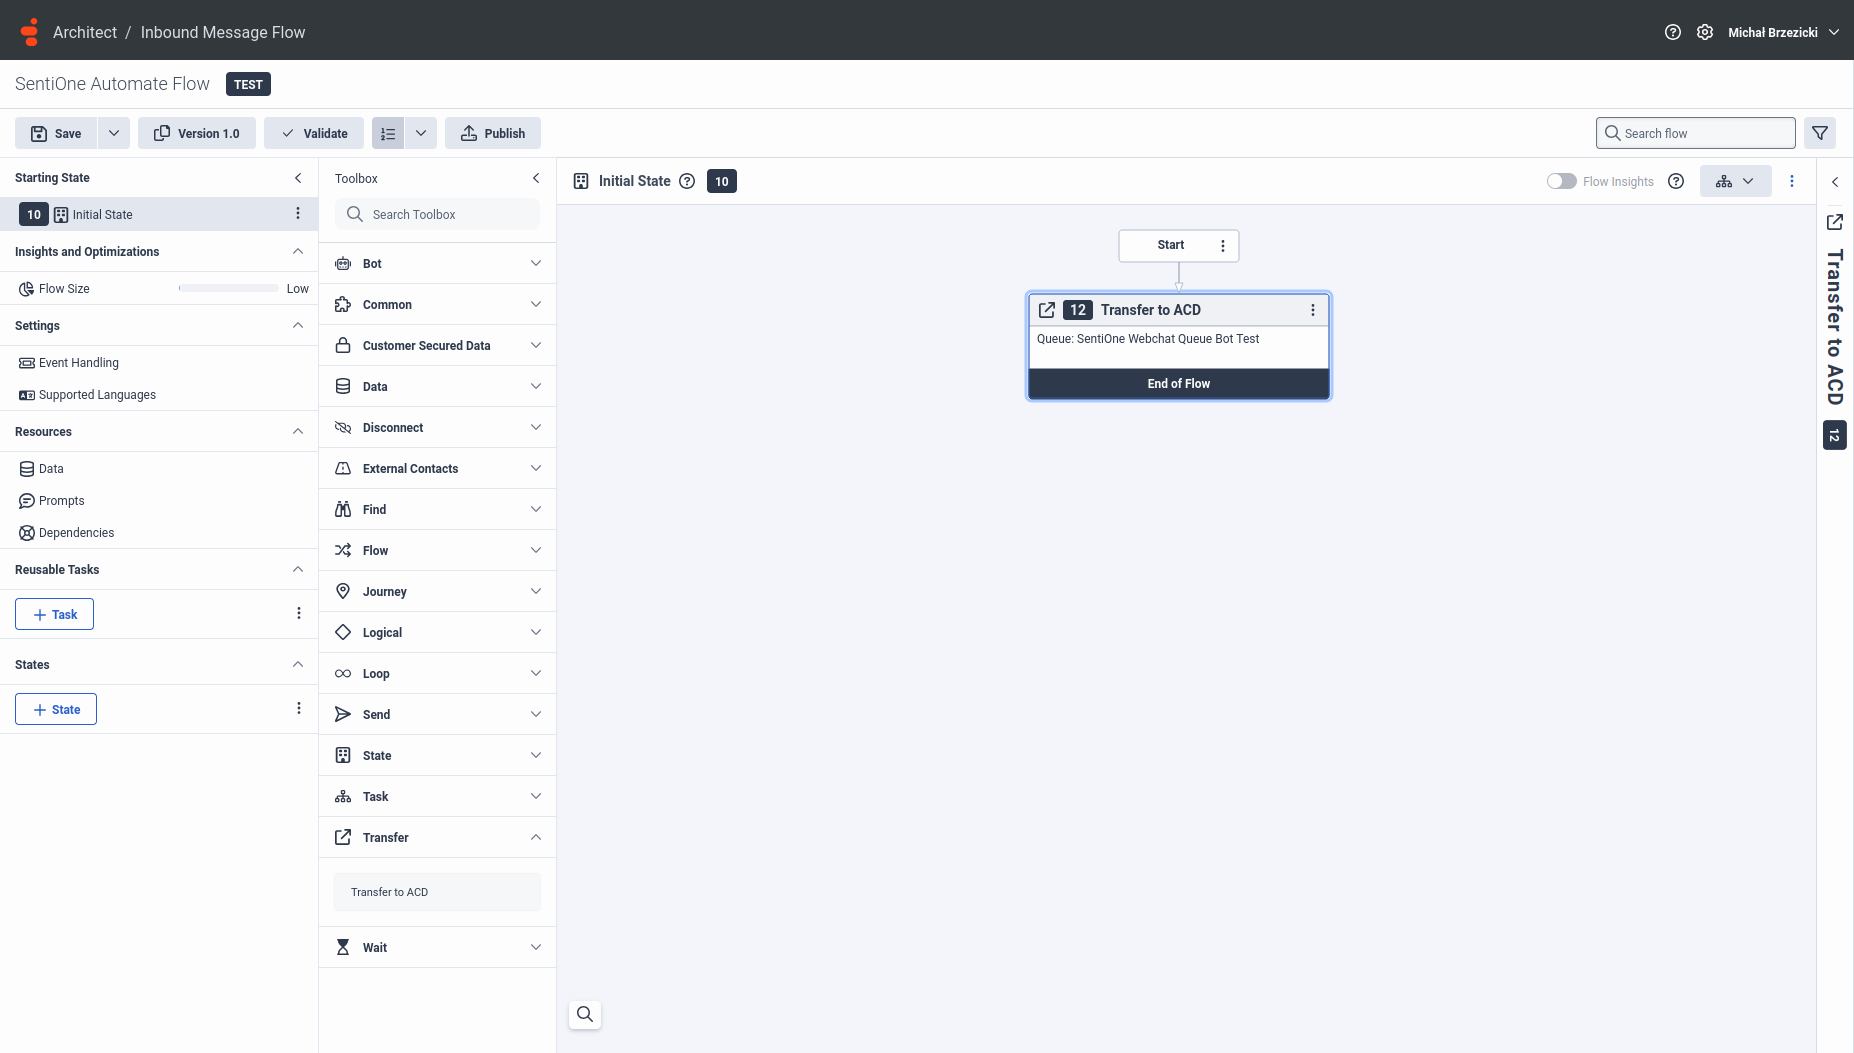
Configure Flow
- Create flow with the following blocks:
- Start: Configure initial message handling
- Add Transfer to ACD:
- Drag and drop "Transfer to ACD" action
- Queue Selection: Select the bot queue created in Step 5
- Create flow with the following blocks:
-
Publish Flow
- Click Publish to make the flow active
- Confirm publication and note the flow is now live
Step 7: Message Routing Setup
Configure Routing Rules
-
Access Message Routing
- Navigate to Admin > Routing > Message Routing
-
Create Routing Configuration
- Click Attach New Address to a Flow
- Select Flow: Choose the flow created in Step 6
- Select Addresses: Choose the Open Messaging integration from Step 4
- Confirm Configuration: Verify the routing is correctly set up
Step 8 (Additional): Supported Content Profiles
Available from version 254Configure this feature only if you require attachment sending functionality from Bot to Agent.
Configure Content Profile
-
Access Supported Content Profiles
- Navigate to Admin > Message > Supported Content Profiles
-
Create Content Profile
- Click New Content Profile
- Enter a descriptive Profile Name
- Switch to the Inbound tab and add your desired file types
- Complete the process by clicking Create
-
Apply Content Profile to Messaging Configuration
- Navigate to the Messaging Configuration created in Step 4
- Click Configure
- Select your Supported Content Profile from the dropdown
- Save your changes by clicking Save
Step 9: Complete WebChat Channel Configuration
Finalize Integration in SentiOne Automate
- Complete WebChat Channel Configuration
- Use the OAuth credentials from Step 2
- Use the Webhook Secret from Step 4
- Select appropriate Region for your Genesys Cloud
- Choose the integration from Step 4
Updated 5 months ago